Содержание
Widgets
Widgets are small blocks that are displayed on the site pages. They can be displayed in a sidebar, header, footer or page body. Find a detailed widget description here.
Video
You can watch a real time Video Tutorial of how to create a useful widget with the most detailed description of its inner structure.
Introduction
Each widget consists of several files. The main logic is located in the file with the widget class. Text messages are located in the language file. Its appearance is defined in the widget template.
The widgets are devided into two types depending on whether a particular widget belongs to any component or is independent:
| Type | Description | Examples |
|---|---|---|
| General | An independent widget which is not logically bound to any of the components and is available separately | Menu, Text block, Weather forecast |
| Component widget | It is referred to some component, uses its model to get data, is available with this component | Content list, Comment list, Login form |
The widget type does not fundamentally influence its implementation but only defines where (in what folders) the widget files will be located and how its class will be called.
The type also determines on which palette tab this widget will be displayed in the control panel:
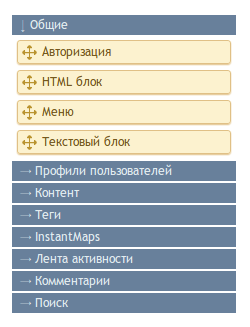
Common widgets are displayed on the same-name tab, while component widgets are displayed on the tabs with the title of a bound component.
In each section, the differing moments will be separately described for each of the types.
Registering in the Database
Register the widget in the database to make the widget appear in the control panel and available on the site. Do this by adding a row to the widgets table with the following fields:
| Field | Description | Example |
|---|---|---|
| controller | Bound component title. Leave empty for common widgets (null) | comments |
| name | Widget title. Used in the folder and class titles | list |
| title | Widget title. Can be overridden by a user in the control panel | List of comments |
| author | Author’s name or title | InstantSoft |
| url | A link to the author’s site or widget | http://instantsoft.ru |
| version | Installed widget version | 1.0 |
After adding a widget to the database, you can bind it to the site pages in the control panel. However, you should create its class to display it on the site.
Main Widget File
File location depends on the widget type.
For common widgets: /system/widgets/{widget title}/widget.php
For example: /system/widgets/menu/widget.php
For component widget: /system/controllers/{component}/widgets/{widget title}/widget.php
For example: /system/controllers/comments/widgets/list/widget.php
Widget Class
The widget class is defined in the main file, the title of which depends on the type too:
For common widgets: widget{WidgetTitle}
For example: widgetMenu
For component widget: widget{Component}{WidgetTitle}
For example: widgetCommentsList
The class should be inherited from the cmsWidget system class and have the run() public method. This method should return an array (may be empty) or false. If we return an array, its contents will be passed to the widget’s template. The array keys will turn into separate variables in the template. If we return false, the widget will not be displayed on the page.
An example of the “Authorization” widget class:
//system/widgets/auth/widget.php
class widgetAuth extends cmsWidget {

    //we disable widget caching
    public $is_cacheable = false;

    public function run(){

        // if a user is already authorized,
        // we return false to hide the widget
        if (cmsUser::isLogged()){ return false; }

        // otherwise, we return an empty array to output
        // the widget template
        return array();

    }

}
This widget does not contain any particular logic, its main task is to display the login form, which is described in the template. There is no need to pass any additional data to the template, for this reason, an empty array is returned.
Other methods can be defined in the class, at your discretion.
Language File
If a widget, its options or a template outputs some preset text messages, place them in the language file. File location depends on the widget type.
For common widgets: /system/languages/{languages}/widgets/{widget_title}.php
For example: /system/languages/ru/widgets/menu.php
For component widget: /system/languages/{language}/controllers/{component}/widgets/{widget_title}.php
For example: /system/languages/ru/controllers/comments/widgets/list.php
Language constants
Inside the language file, the constants are defined in the same way as the controllers. The scheme of naming the constants depends on a widget type.
For common widgets: LANG_WD_{WIDGET}_{MESSAGE}
For example: LANG_WD_MENU_MAX_ITEMS
For component widget: LANG_WD_{COMPONENT}_{WIDGET}_{MESSAGE}
For example: LANG_WD_COMMENTS_LIST_SHOW_TEXT
A sample fragment of the English language file for the “Comment list” widget of the “Comments” component:
define('LANG_WD_COMMENTS_LIST_SHOW_TEXT',    'Show comment text');
define('LANG_WD_COMMENTS_LIST_SHOW_AVATARS', 'Show authors’ avatars');
Widget Settings
When a widget is added to a page, in the Control panel, a pop-up window with its customization form appears. There are two tabs in this window - “General” and “Access”. The widget can add additional tabs with fields to customize the options.

For this, the widget should have the form description file.
The form’s file is called options.form.php and is located in the same folder as the main file of the widget (widget.php). Inside, you should describe the form that contains fields to customize the widget options. The title of the form class depends on the widget type.
For common widgets: formWidget{WidgetTitle}Options
For example – formWidgetMenuOptions
For component widget: formWidget{Component }{WidgetTitle}Options
For example – formWidgetCommentsListOptions
Inside the form, one or several field sets (fieldsets) are described. Each set must have a title, because each set turns into a separate tab in the widget customization window.
 Field titles should be as follows:
 options:{option_title}, for example, options:show_text. The options: prefix is required!
A sample class of the “Comment list” widget’s customization form, which you can see on the screenshot above:
class formWidgetCommentsListOptions extends cmsForm {
    public function init() {
        return array(
            array(
                'type' => 'fieldset',
                'title' => LANG_OPTIONS,
                'childs' => array(
                    new fieldCheckbox('options:show_avatars', array(
                        'title' => LANG_WD_COMMENTS_LIST_SHOW_AVATARS,
                        'default' => true,
                    )),
                    new fieldCheckbox('options:show_text', array(
                        'title' => LANG_WD_COMMENTS_LIST_SHOW_TEXT,
                        'default' => false,
                    )),
                    new fieldNumber('options:limit', array(
                        'title' => LANG_LIST_LIMIT,
                        'default' => 10,
                        'rules' => array(
                            array('required')
                        )
                    )),
                )
            ),
        );
    }
}
Getting Settings
The values of options specified in the widget settings can be got in the main widget class with the help of the getOption($option[, $default]) custom method, where $option is an option’s title, $default - a default value (false, if not specified):
$limit = $this->getOption('limit', 10);
Please note that the «options:» prefix is not used in this case.
Widget Templates
The widget should have at least one template.
The location of the template file depends on the widget type.
For common widgets: /templates/{theme}/widgets/{widget}/{widget}.tpl.php
For example: /templates/default/widgets/menu/menu.tpl.php
For component widget: /templates/{theme}/controllers/{component}/widgets/{widget}/{widget}.tpl.php
For example: /templates/default/controllers/comments/widgets/list/list.tpl.php
Passing data to a template
As described above, the run() method in the widget class can return an array containing titles and values of the variables available in the template.
Widget’s sample class:
class widgetExample extends cmsWidget {
    public function run(){

	$nickname = cmsUser::get('nickname');
	$date = date('d.m.Y');

	return array(
		'name' => $nickname,
		'today' => $date
	);

    }
}
Sample template for this widget:
<h3>Hi, <?php html($name); ?>!</h3>
<p>Today <?php html($today); ?></p>
(In this example, the text is hard-coded; you should use language constants in real templates)
Widget Wrapper
When a widget is output on a page, the widget template is wrapped (placed inside) with one more template – a wrapper. There can be several wrappers stored in the /templates/{theme}/widgets folder. For examlpe, the default theme has three available wrappers:
- wrapper.tpl.php – default for all widgets. Contains the output of the widget’s title and body, in which its work result is placed;
- wrapper_plain.tpl.php – an “empty” wrapper, simply outputs the widget body, doesn't add any additional tags around;
- wrapper_tabbed.tpl.php – a wrapper that allows to output several widgets at once (each on a separate tab).
Either the widget itself (see below) or the main site template defines which wrapper to use.
Widget Properties and Methods
The cmsWidget system class, from which each widget is inherited, contains several useful properties and methods that allow to edit the widget output from its code.
Title
Editing the widget title:
$this->title = 'New title';
Disabling the widget title:
$this->is_title = false;
Position changing
The widget can reposition itself to another place in the template:
$this->position = 'sidebar';
Links in header
The widget header can have one or several links:

They are tuned in the Control panel, but the widget can dinamically form them from the code:
// an array of links in the format: Title|URL
$links = array(
    ‘Yandex|http://ya.ru',
    'Google|http://google.com'
);
// we add links to the widget header
$this->links = implode("\n", $links);
In this example, the links specified in the settings will be replaced by the ones described in the code. Replace the last string, if you need them not to be replaced but supplemented:
$this->links .= "\n" . implode("\n", $links);
Caching
The output of widgets is cached, if caching is enabled in the site settings. However, it may be undesirable for some widgets (for example, for those displaying different content to each user).
Disabling caching
$this->disableCache();
Caching can be permanently disabled, for this, the widget class should override the $is_cacheable property by the false value:
public $is_cacheable = false;
(This string is added inside the class but outside the run() method)
Adding a CSS-class
The widget can add a CSS-class to its body wrapper:
$this->css_class = 'my-class';
Template editing
By default, the widget uses the template from the {widget_title}.tpl.php file (the file’s location is described above). Nevertheless, you can create other templates in the same folder. Select the template inside the widget in the following way:
$this->setTemplate('anotherfile');
In this case, the widget will use the anotherfile.tpl.php template.
Wrapper editing
You can dinamically edit the wrapper by specifying its title (without an extension) inside the widget code:
$this->setWrapper('wrapper_plain');